Enable or Disable Auto Enhance on iPhone Photos in iOS 16
In order to have the desired control while editing an image, I prefer to keep the auto-enhance tool disabled. As someone who wants the images to look real, I can’t help but hate this tool. More so when it fails to live up to the mark. Thankfully, there is a quick way to take control of it.
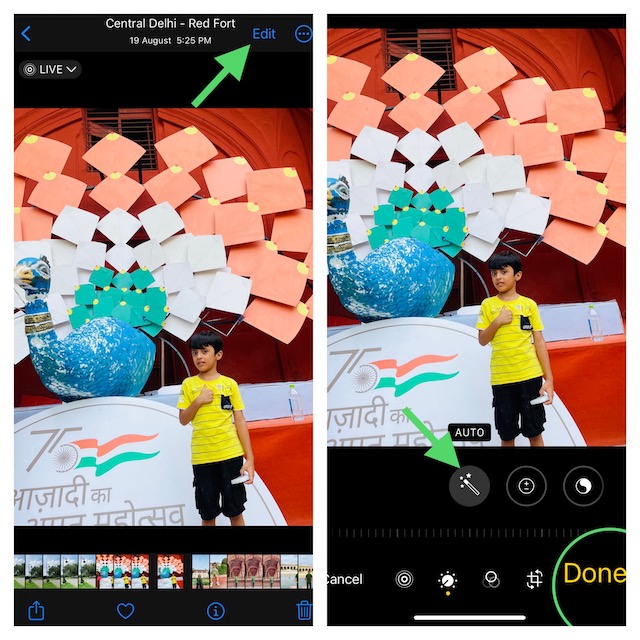
- To begin with, open the Photos app on your iPhone.
- Now, navigate to the image that you would like to edit.
- Tap on the Edit button that shows in the upper-right corner of the screen.
- Next, check out the tiny auto-enhance tool (looks like a magic wand). Tap on this very tool to turn auto-enhance off/on.
- Be sure to tap on Done, which appears in the bottom right corner of the screen, to finish.
Wrap Up…
And that’s pretty much to turning the auto-enhance tool off or on in images on your iOS device. No matter how cool a feature may be, it won’t appeal to everyone’s taste. Hence, it’s always advisable to offer an option to manage the feature. It’s well-thought-out to automatically adorn the appearance of an image so that users can share them without having to spend plenty of time behind editing. However, not everyone (especially those who want to have the desired control over the image) wants this tool. And that’s the reason why the ability to tweak it is appreciable. What do you think? Read more:
How to Remove Background from Images in Files App in iOS 16How to Fix iOS 16 Lift Subject From Background Not Working on iPhone