Dell, the American multinational computer technology company that create laptops used by people all across the globe. The company makes laptops that offer value for money. Even I’m writing this blog post using one of the popular laptops from Dell (Inspiron 5370). Most of the laptop comes with a one-year standard warranty, but warranty varies from laptop to laptop. Under warranty, if laptop hardware failure happens, the company offer users free repair or full unit replacement under extreme conditions. For Dell support lovers, the company offers an extended warranty scheme that let users extend product warranty for up to five years. Sometimes your laptop starts behaving abnormally and makes you think that its time to call Dell customer support to send one of their engineers to have a look at it. Now if your Dell laptop is under warranty, then the Engineer will fix all the issues free of cost. But on the other hand, if the laptop is out of warranty is finished, you know not only have to pay for the faulty hardware, but you also have to pay engineer visiting charges. To clear all the confusion if your laptop is under warranty or out of warranty, you want to perform a Dell warranty status. But the question is, how? No doubt, there are lots of users want to know the answer to the question, i.e., How to perform Dell laptop warranty check? No worries, here’s what you need to do.
How to Perform Dell Warranty Check for Laptop
There are lots of ways to check Dell laptop warranty status and here goes the first method.
Check using Dell SupportAssist utility
You can use Dell SupportAssit utility to check the dell laptop warranty. It is an all in one program that let users detect issues, remove malicious programs, optimize essential settings, and gives you regular alerts when a new update is available. It comes with every laptop out of the box. Apart from that, it has all the information about your laptop, including Dell warranty status. Here’s how you can perform a Dell warranty check for a laptop using SupportAssist.
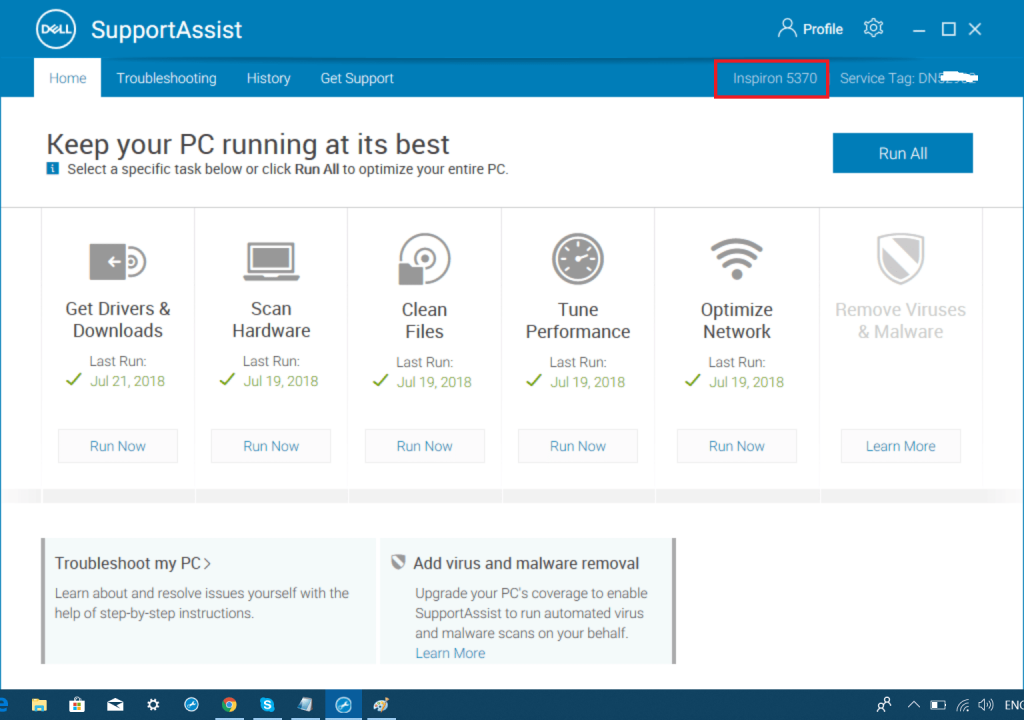
- Launch Dell SupportAssist on your laptop. In Windows, you can search for it using the start menu search bar and when it appears in the search result click to open it.
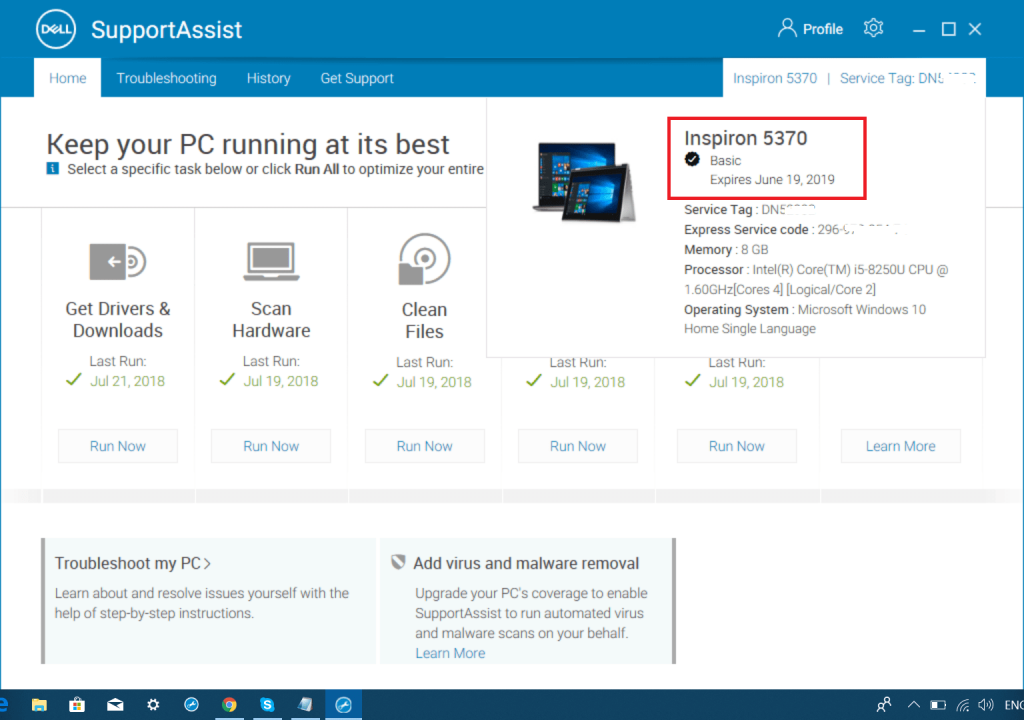
- Here on the upper right corner of the program, you will find the model number of your laptop. In my case, it is Inspiron 5370. You need to hover the cursor where the model number of the laptop is listed. Instantly menu will open up. Here you will find out the warranty of your Dell laptop. In my case, it comes under a basic one year warranty which going to expire on June 19, 2019. Apart from that, you will find additional information like:
Dell Service tagDell Express Service codeLaptop MemoryLaptop ProcessorLaptop Operating system
In case, the Dell SupportAssist program is missing on your laptop out of the box, no worries. You can also download it from the official site. Use the following link: Due to any reason, if the above link is broken or there is no option to download Dell SupportAssist program, then you can search for this utility on Google. I bet you will find an official page to download the tool.
Check it online (Dell Official Site)
In case, due to whatever reason, you fail to check dell warranty status using SupportAssist, then there is an alternate way to do so. You can check the warranty of the laptop on Dell official site. Here’s how you can do that:
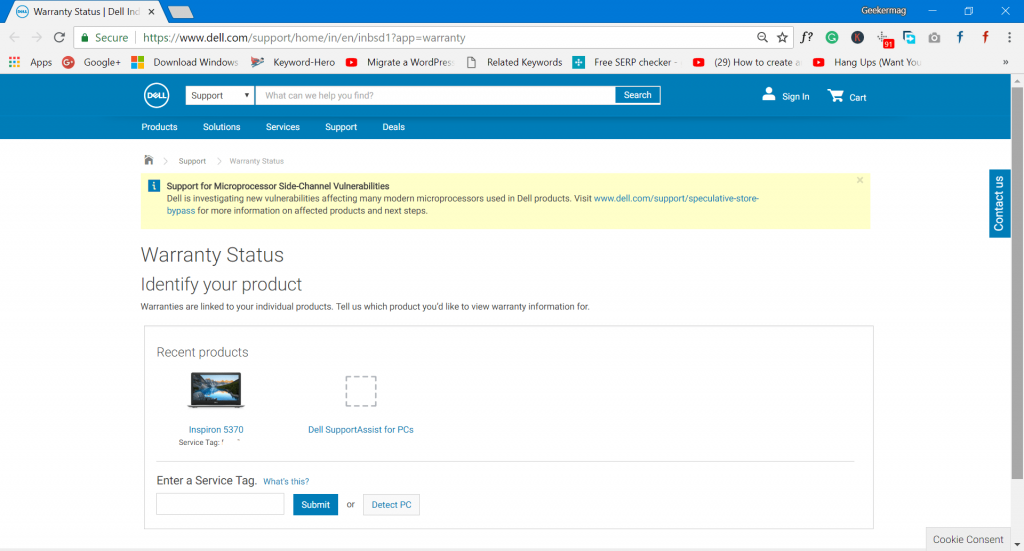
- First of all, you need to visit the Dell Warranty Status page.
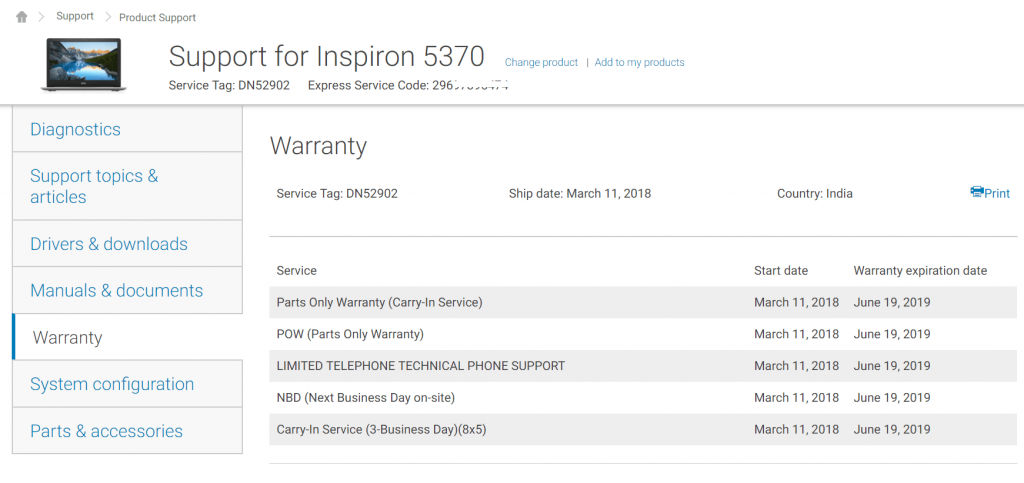
- Here, you need to look for “Enter a Service Tag.” Mostly available at the bottom left side of the page. Enter the service tag of the laptop in the space provided and click Submit. In a few seconds, you will get all the warranty status. In case, you don’t know the Service Tag, then not to worry. Click on Detect PC button next to submit button. This will automatically detect your laptop and show you the warranty status of the laptop. So these are possible ways to perform the Dell warranty check for laptops. Find this blog post useful? Don’t forget to share your feedback in the comments.


