So What is Memory Compression in Windows 11? It’s a nifty memory management feature that make use of available memory (RAM) efficiently by reducing physical memory utilization, that results in minimal pagefile Input/Output operations and lesson the dependency on the disk.
Memory Compression feature is enabled, Memory Memory compresses the memory pages that aren’t accessed frequently, lesson read-write task on the disk (pagefile) and as a results improve responsiveness.
Apart from that, it also lesson the memory utilization per process, create possibilities for the Windows OS to have more apps in the physical memory before validating paging.
According to Microsoft, the purpose of adding Memory Compression feature is to offer users better usability and responsiveness in Windows OS. The feature was first introduced in Windows 10 and following the legacy its also available in Windows 11 as well.
Although, Memory Compression helps in usability and responsiveness, but it eat more CPU resources then normal. So if you’re experiencing abnormal high-CPU usage issue or your system is laggy, then it is high possible that Memory Compression is a behind thing.
Those users who own a device with less RAM must try Memory Compression feature for better usability. On the other hand, users with high RAM lets say 16 or 32GB will get very low benefits and costs higher.
No matter, what is your reason behind landing on this page one benefit you will get is learn steps on how to enable or disable memory compression in Windows 11. Depending on your needs you can take advantage of the steps
Check If Memory Compression Is Enabled Or Disabled in Windows 11
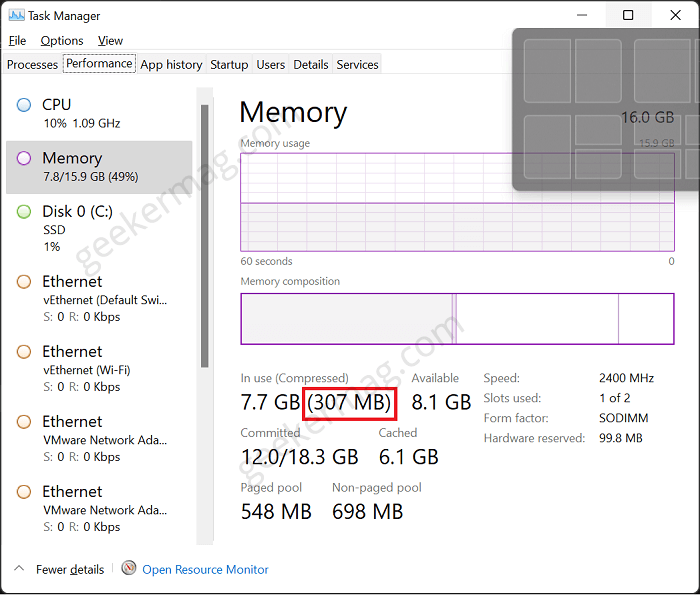
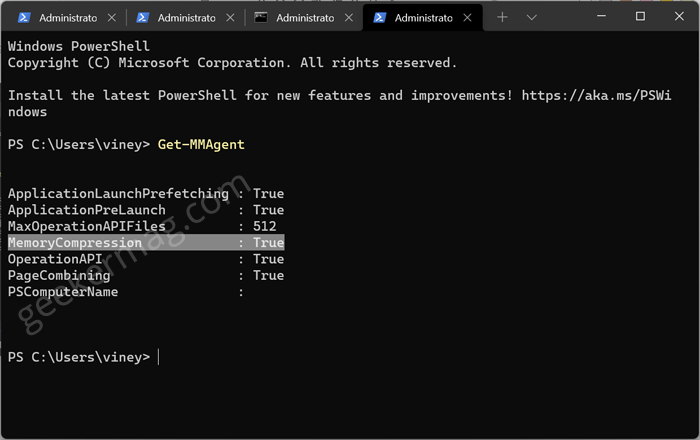
Memory Compression feature is enabled out of the box for some devices. So it is very important to check if Memory Compression feature is Enabled or Disabled. Here’s how you can do that: Launch Task Manager by pressing CTRL + SHIFT + ESC key combination. Switch to Performance Tab available on the top and then select Memory tab on the left pane. Here, check the highlighted area in the screenshot. If its written compressed, then Memory Compression is enabled. You can see that 307 (MB) is compresses. Alternatively, you can check same information using Windows Powershell. For that, you need press WIN + X key combo and then select Windows Terminal (Admin). If UAC dialog box appear, click Yes to continue. In the Windows Terminal, you need to execute this command: Get-MMAgent Here, check out for MemoryCompression. If it is marked True then that means it is enabled. If it is marked False then that means it is disabled.
How to Enable Or Disable Memory Compression in Windows 11
Now that you’re aware of current status of memory compression. You can follow steps discussed below to enable or disable memory compression in Windows 11 depending on your requirement:
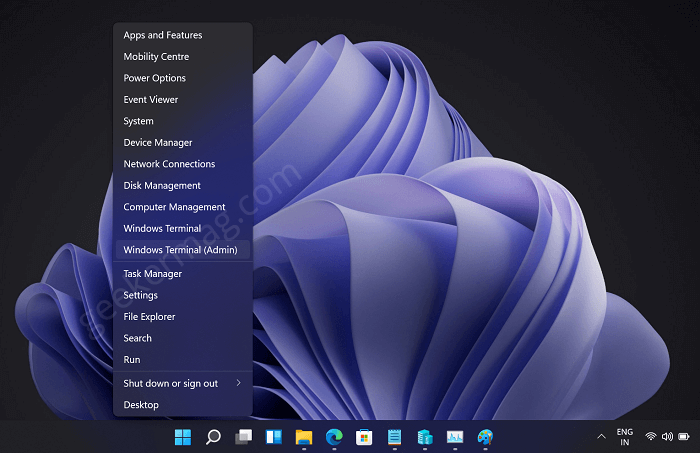
Press Windows + X key combo, and then from the menu click on Windows Terminal (Admin). When UAC dialog box appear, click Yes to continue.
If you’re using Command Prompt as default bash shell in Windows Terminal app, then click on down arrow and select Windows Powershell.
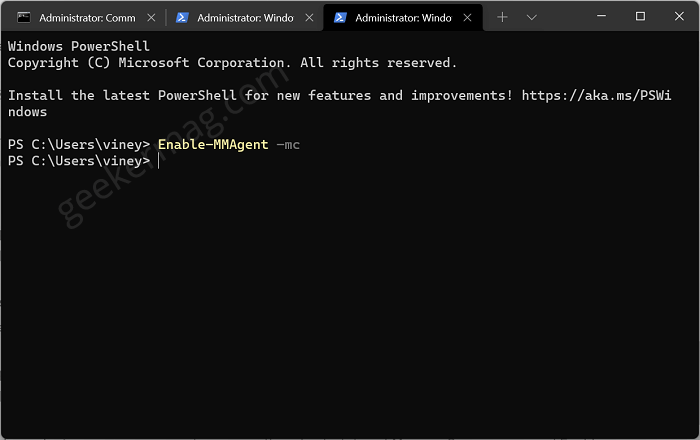
To Enable Memory Compression in Windows 11, you need to execute this command: Enable-MMAgent –mc
Now pointer when moves to next line, confirms that compression is enabled. To apply the changes, close Windows Terminal and reboot your PC.
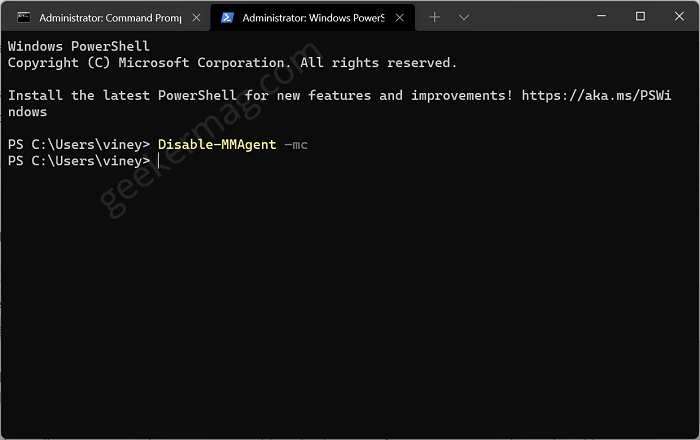
To Disable Memory Compression in Windows 11 , you need to execute this command: Disable-MMAgent –mc.
Now pointer when moves to next line, confirms that compression is disabled. To apply the changes, close Windows Terminal and reboot your PC.
Now depending on your requirement you can either check status of Memory Compression and Enable or Disable Memory Compression in Windows 11.