However, Ulitmate performance plan consumes unreasonable power, so it’s for all PCs, especially the ones with basic specifications. It’s suitable for users who make use of video editing, 3D software, screencasting, and any other program that consumes high system resources.
How to Enable & Add Ultimate Performance Plan in Windows 11
In case, you’re one of those users performing this type of action on your Windows 11 PC, then the Ultimate plan is worth trying. Here in this guide, you will learn how to enable and use Ultimate Performance in Windows 11.
Enable Ultimate Performance Plan using Control Panel in Windows 11
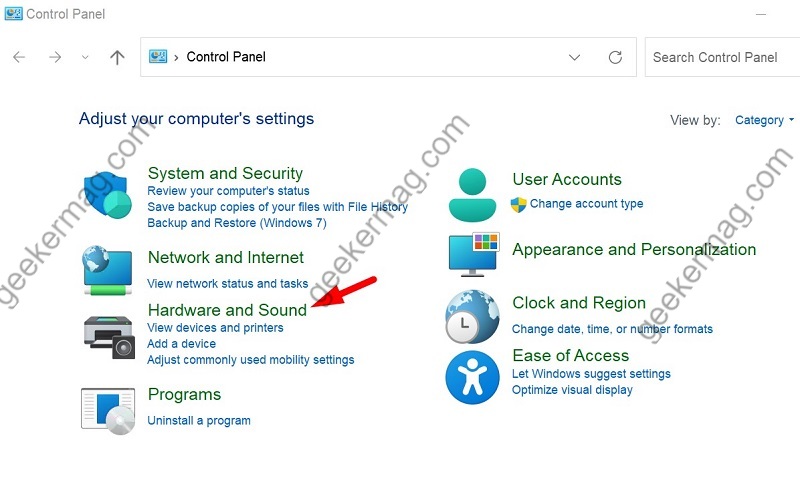
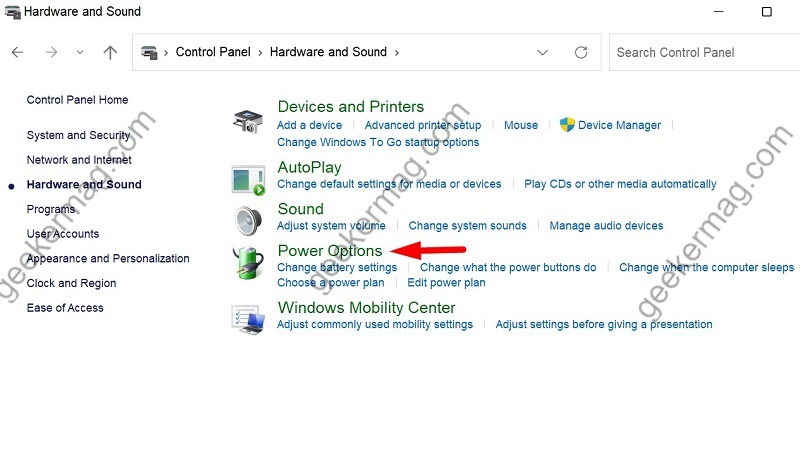
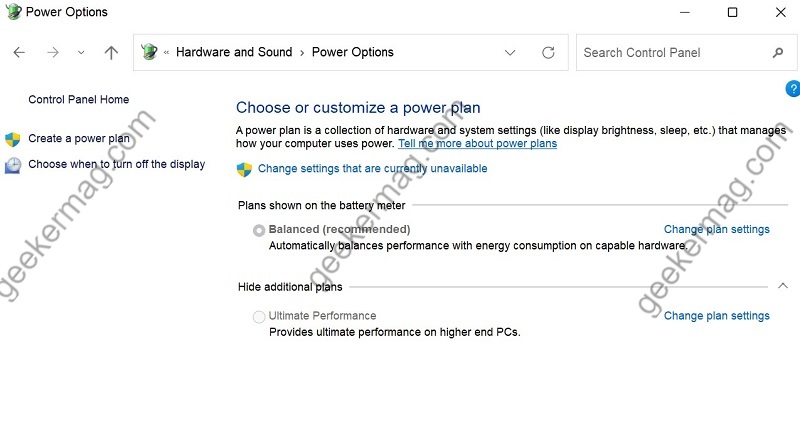
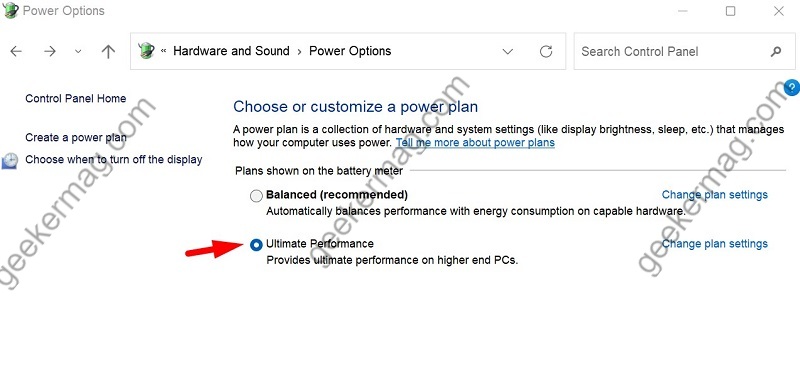
Open the Control panel first and then go to Hardware and Sound. Then find and select the Power Options tab. Here you will see all available power plans for your Windows system. If the Ultimate Performance Plan is there, it will also show up. If it is not there, then you need to manually enable it. (Check below to enable the Ultimate Performance Plan) If you see Ultimate Performance Plan, expand the Show additional plans option and then click on the radio button to select it. If you can’t select the radio button, click on the Change Settings that are currently unavailable option in power options. Close Control Panel and it is done.
How to Add Ultimate Performance Plan in Windows 11
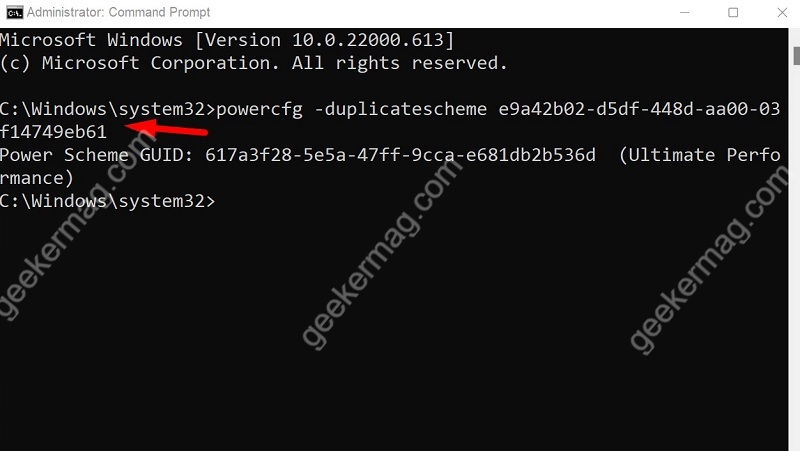
Open the start menu with the Windows button and search for CMD and then right-click on it and choose open with administrator rights. Copy-paste the following command: powercfg -duplicatescheme e9a42b02-d5df-448d-aa00-03f14749eb61 and then press enter. Now the Ultimate Performance Plan is enabled on your Windows 11. Follow the same steps mentioned above to enable the Ultimate Performance Plan. Why don’t you try the Ultimate Performance Plan on Windows 11 PC and let us know your experience with us? Does it really give a boost?
