If you are also facing sound and audio output issues on your PC after you have upgraded to Windows 11, and you are looking for a way to fix it, then this article will help you with it.
Ensure Your Output Device Is Not Faulty
Ensure the sound output device on your laptop or your Desktop PC is not faulty. If the output device is faulty, then you may consider replacing it. In case, if you use an external output device, then ensure it is properly connected to your PC. If the device is properly connected, and it is not faulty, then you should try the troubleshooting steps mentioned in this article.
Run Audio Troubleshooter
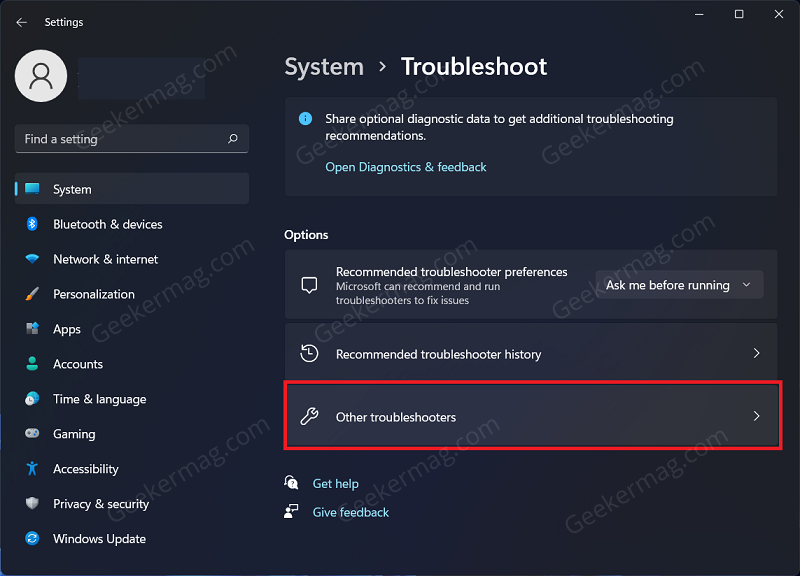
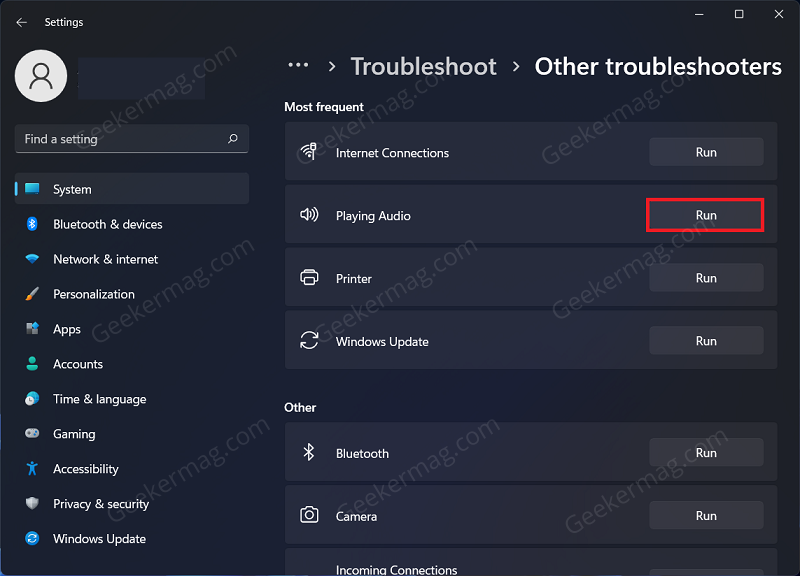
If the audio is not working on Windows 11, then you should try running the Audio Troubleshooter on your PC. To do so, press the Windows + I key combo to open the Settings app on your PC. Ensure you are on the System tab on the left sidebar of the Settings app, and then on the right side click on Troubleshoot. Next, click on Other troubleshooters. After doing so, click on the Run button next to the Playing Audio option. Now, follow the on-screen instruction to run the audio troubleshooters, and the issue will be fixed.
Restart The Windows Audio Service
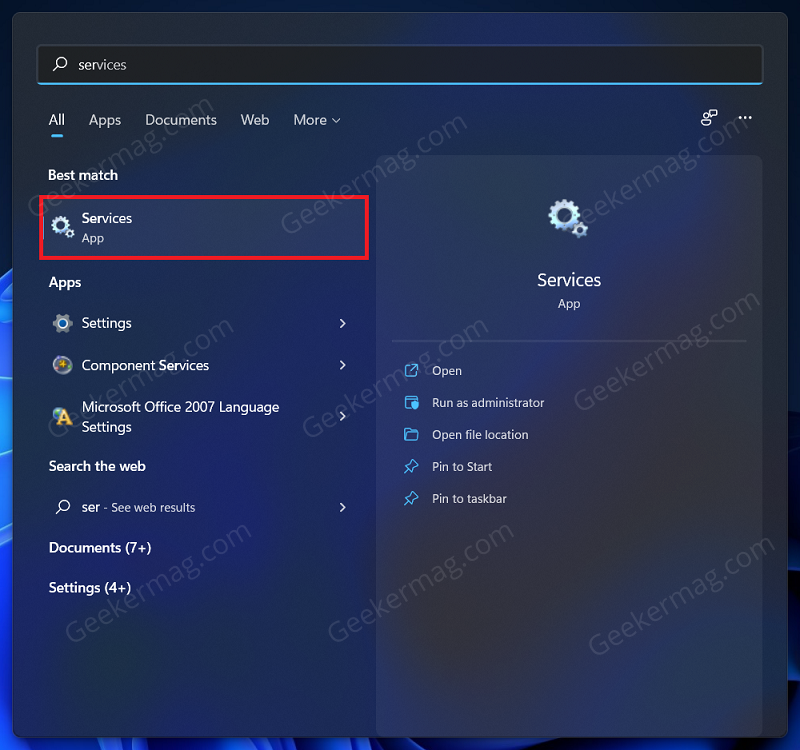
Another thing that you can try doing is restarting the Windows Audio Service. To restart the Windows Audio Service, follow the steps given below- Press the Start key to open the Start Menu. In the Start Menu, search for Services and hit Enter to open the Services app window. In the Services app window, search for Windows Audio service. Right-click on the Windows Audio service, and then click on the Restart option to restart the service. You will have to do the same for the Windows Audio Endpoint service and Remote Procedure Call service.
Update And Reinstall Sound Device’s Driver
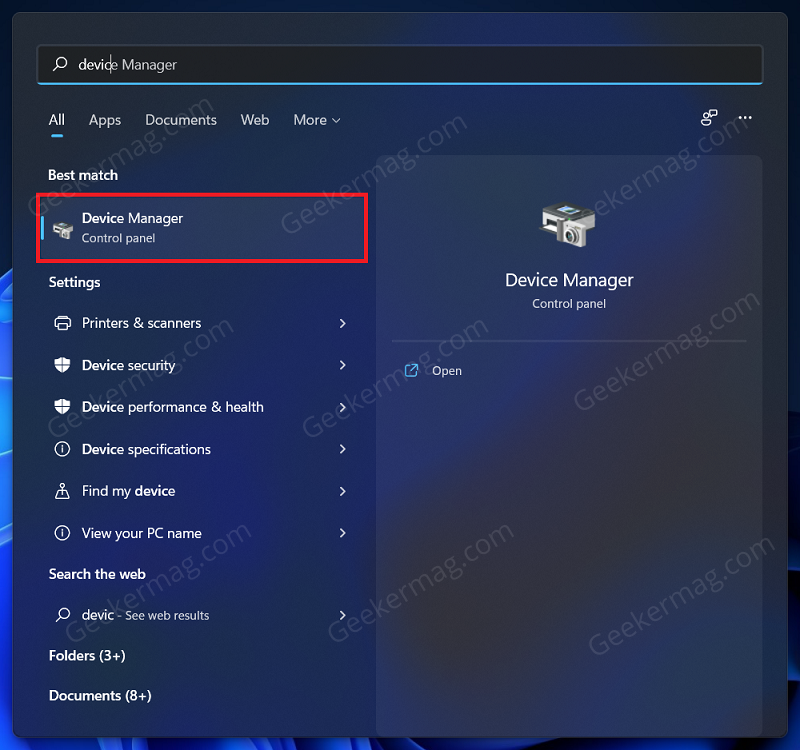
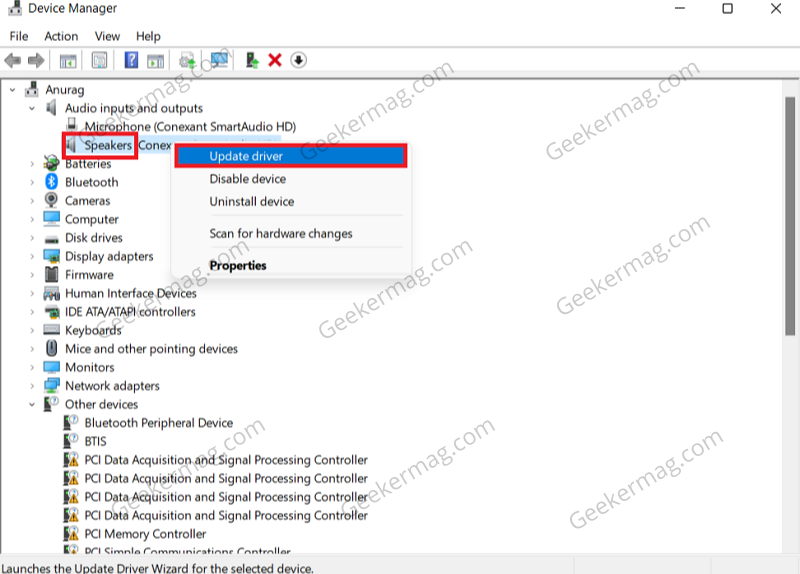
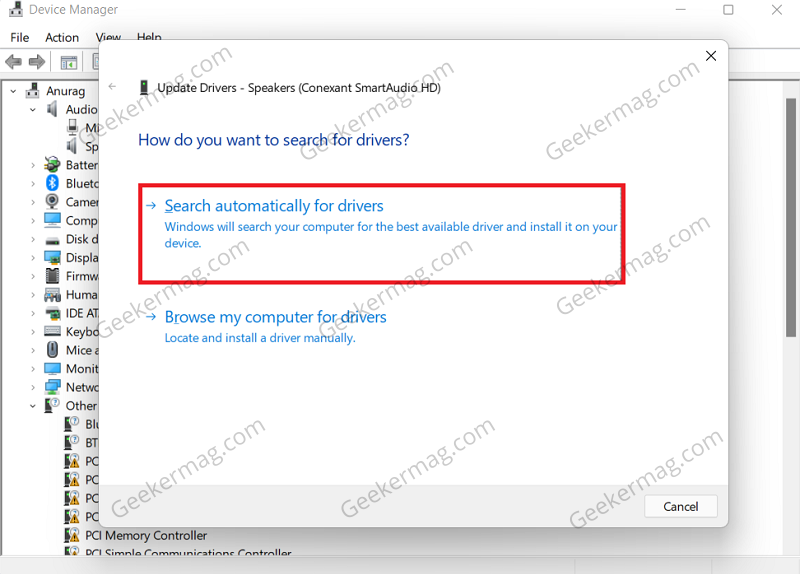
You may also face issues with the audio output due to the outdated audio device driver. You should try updating the audio device driver to fix the issue you have been facing. Open the Start Menu on your PC by pressing the Windows key. In the Start Menu, search for Device Manager. Click on Device Manager from the search result to open it. Here, expand the Audio inputs and outputs section by double-clicking on it. Now, from the list of input and output devices, select your speaker. Right-click on it, and then click on Update Driver. Next, click on the Search automatically for drivers option to search the internet for drivers and update them automatically. If updating the driver didn’t help you, then you should try reinstalling the sound device driver. In the Audio inputs and outputs section in the Device Manager, select your speaker. Right-click on the speaker, and then click on Uninstall device. When asked to confirm uninstalling the device, click on Uninstall. After you have uninstalled the driver, restart your device, to reinstall it. Alternatively, if you receive a message that you’re running the latest audio drivers, then you need to head over to the manufacturer driver website and download the latest audio drivers.
Update Windows 11
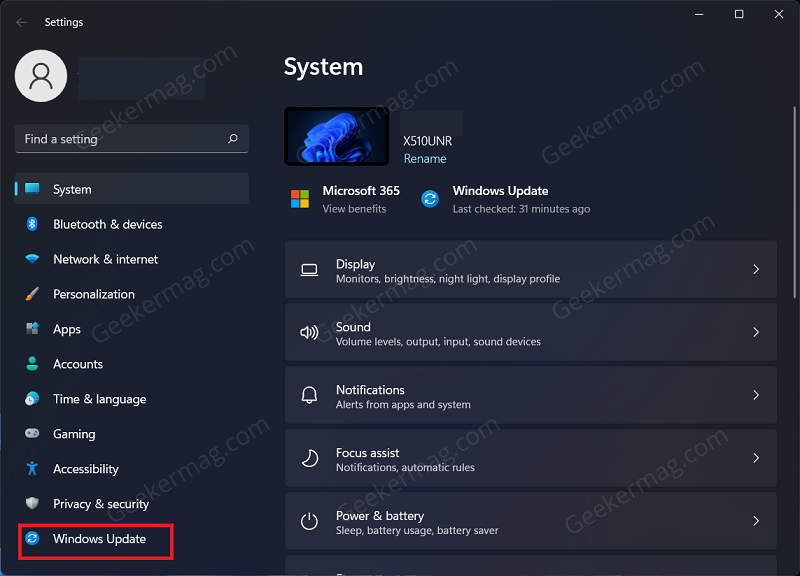
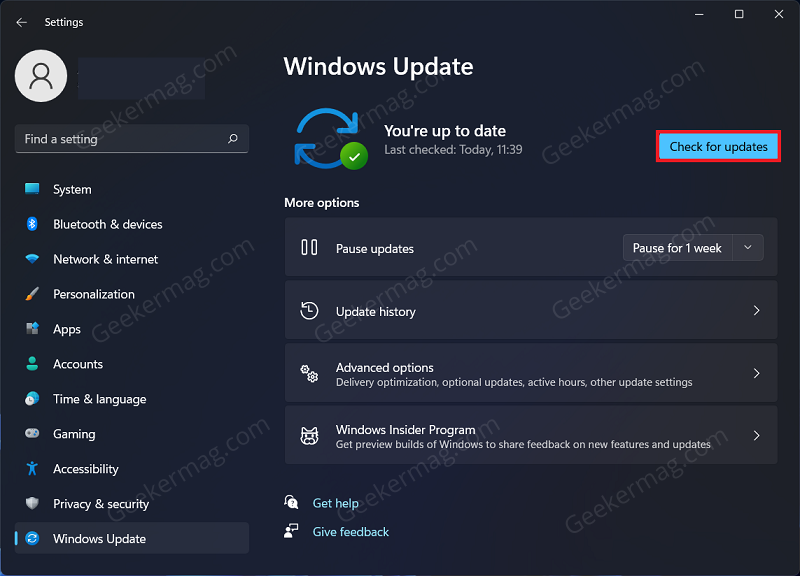
You should try updating your Windows 11 if you still face the issue even after trying all the above troubleshooting steps. To update Windows 11, follow the steps given below- Open the Settings app on your PC by pressing the Windows + I key combo. On the left sidebar of the Settings app, click on Windows Update. Now on the right side, click on Check for Updates button. After doing so, download and install the updates on your PC, and the issue should be fixed. Apart from that, if any of the methods discussed above fail to fix the issue, then you can repair install Windows 11 with in-place upgrade. If this method also fails to fix the issue, then the last resort is to reset your Windows 11 PC. In case, you know any other solution that helps you in fixing sound or audio issues in Windows 11 PC and we fail to cover in this blog post, then feel free to share in the comments.

