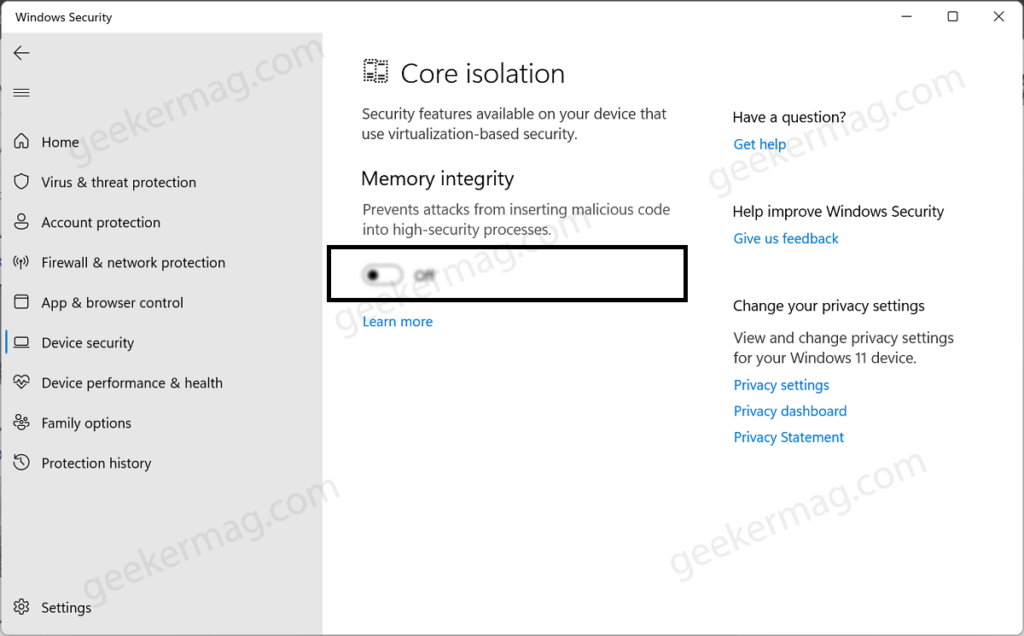
With default settings, the Memory integrity option is disabled in Windows 11 and users have to enable it manually. However, many users have reported that when they have over to Windows Security > Device Protection > Core Isolation Details. On this page, the Memory Integrity option is greyed out on their Windows 11 PC.
How to fix Memory Integrity options greyed out in Windows 11
If you landed on this page, then it’s highly possible that you’re also facing the same issue. Fortunately, there are possible solutions available using which you can fix the issue. Let’s start with the first one:
Reboot your PC
A temporary bug in your Windows 11 PC can trigger this annoying behavior. So try to reboot your PC and check if you still encounter the issue or not.
Virtualization Disabled in BIOS
Sometimes disabled hardware virtualization in BIOS can trigger this issue as well. So, enter BIOS on your Windows 11 PC and turn it ON. You can search the web for steps about how to turn on hardware virtualization in BIOS for your device mother. Following these basic troubleshooting steps should most probably fix the issue. However, if the Memory Integrity is still greyed out in Windows 11 then you can move to the next troubleshooting step in this article.
Update Windows
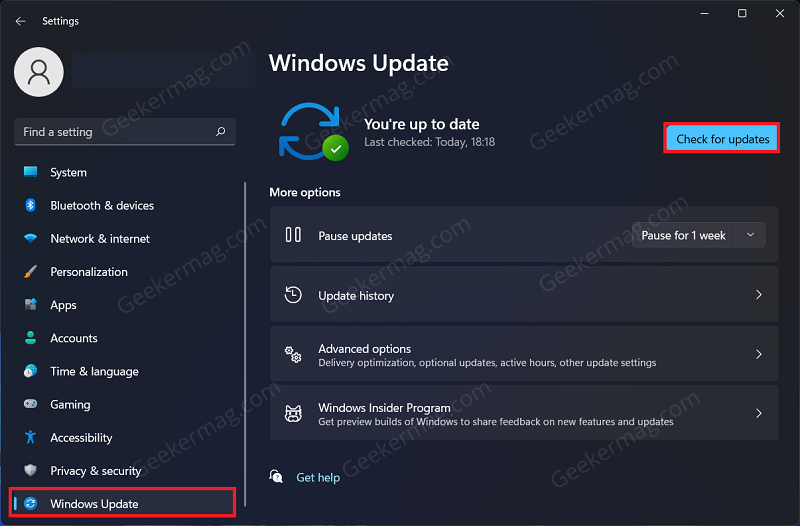
You may also face this issue if your Windows is outdated. You should try updating the WIndows and then check if you face the issue or not. To do so, open the Settings app first by pressing the Windows + I key combo. Head to the Windows Update section from the left sidebar of the Settings app. Now on the right side, click on Check for updates button. Now download and install all the updates your PC finds and restart the PC.
Perform SFC Scan\
It is possible that you’re seeing the Memority integrity option is grayed out because of a corrupted system file. In this situation, Use System File Checker (SFC) to Repair System Files in Windows 11. Wait for the process to complete and then restart your PC. Upon restarting the PC, the issue should be fixed and you will be able to use the Memory Integrity option now.
Updating Driver
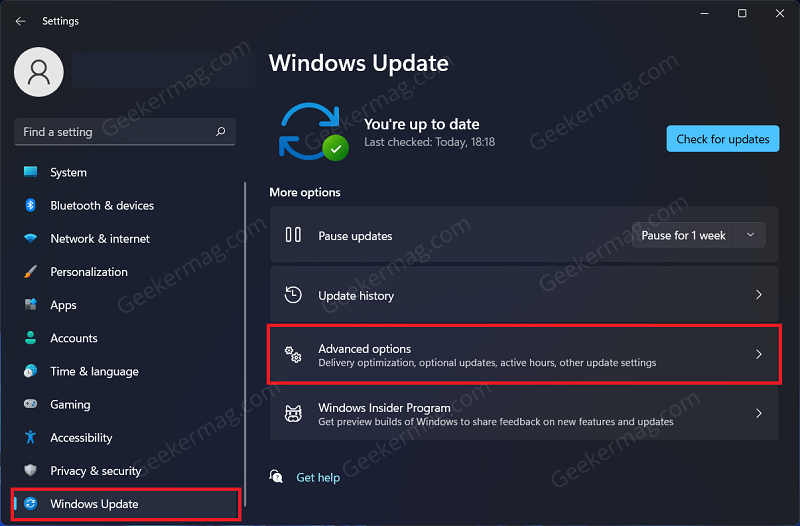
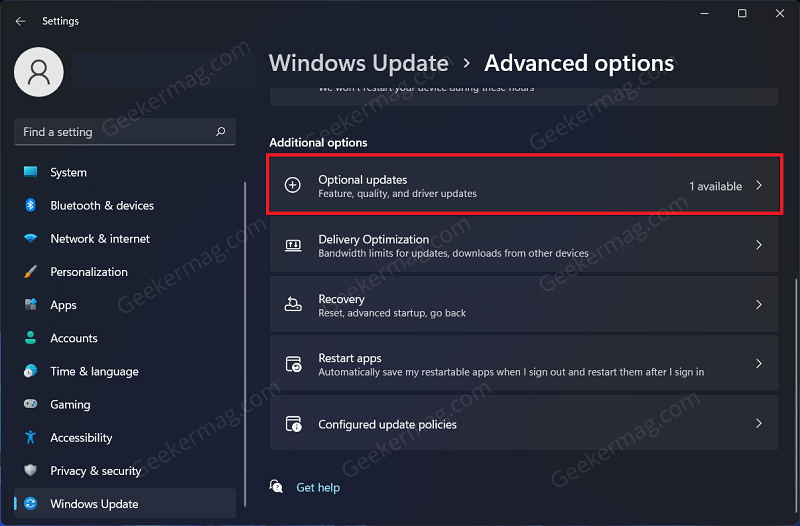
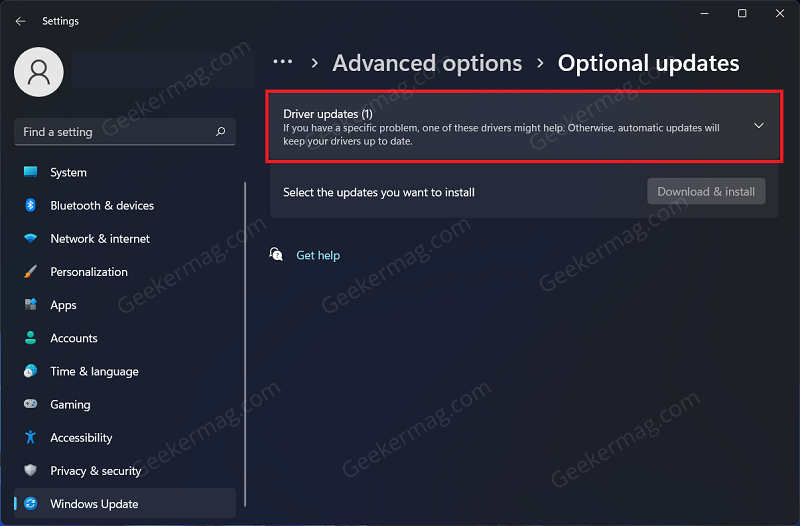
You may also face this issue if you have outdated drivers installed on your PC. You should try updating the drivers and then check if you face this issue or not. Head to the Settings app on your Windows 11 PC by pressing the Windows + I key combo. Now in the Settings app, head to the Windows Update section from the left sidebar. Now on the right side, click on Advanced Options. Here, click on Optional Updates under the Additional Options section. Now, click on the Driver Updates option. Download and install all the driver updates on your PC. You can either download the latest drivers from your hardware manufacturer’s website or manually install them on your PC.
Disable Nested Virtualization
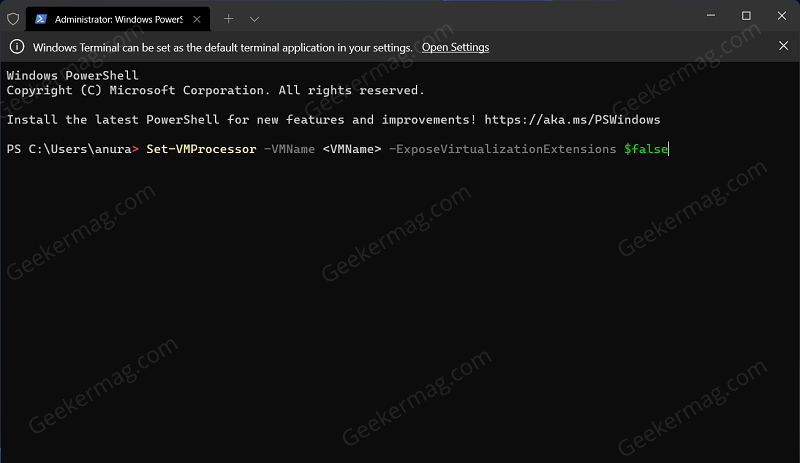
If you have nested virtualization enabled on your PC then also you may face this issue. Therefore, you should disable the nested virtualization first and then check if you face the issue or not. To disable Nested Virtualization, follow the steps given below-
Press the Windows + X key combo, and then from the menu click on Windows Terminal (Admin).
In the Windows Terminal, type and execute the command Set-VMProcessor -VMName
Last Resort
If you made up to this line, then it’s possible that no method discussed above helps in fixing the issue. So you can “Repair Install Windows 11 Using ISO file”. If that fails as well, then try to Reset Windows 11 PC. And, if that fails too, then you are left with no choice, but to perform a clean installation of WIndows 11 on your PC. So these are some possible ways that help in fixing “Memory Integrity Greyed out the issue in Windows 11. ” for various affected users. In case, we forget to mention any other solution that worked for you, then feel free to share with us in the comments.
