There could be various reasons behind this error to occur, but the primary culprits are incorrect internet settings, faulty network drivers, a third-party program conflicting with the internet connection, and a bug that reached your device via the latest Windows update.
How To Fix ‘DNS Server Isn’t Responding’ in Windows 11
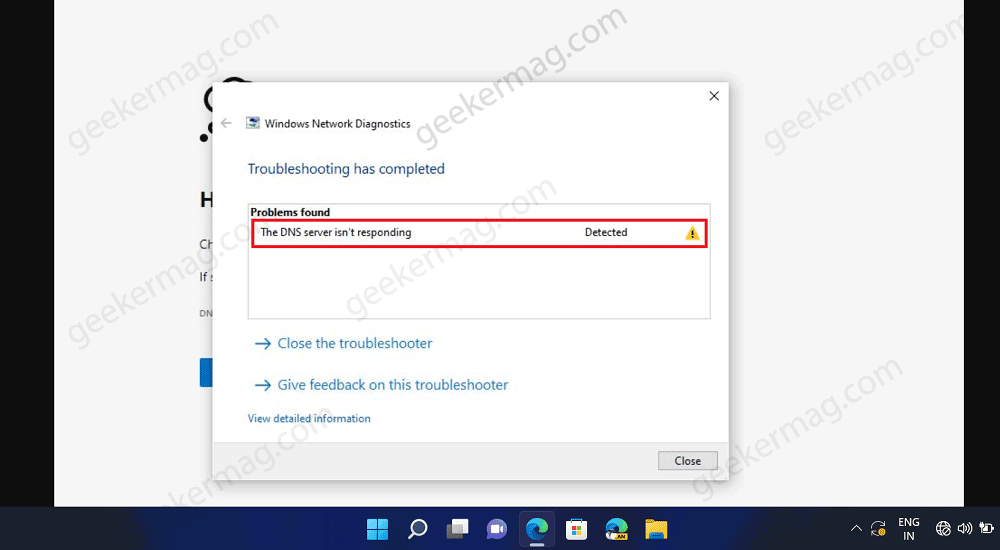
If you’re facing DNS Server that isn’t responding on Windows 11 PC, then there’s nothing to worry about. Usually, most of the issues related to the network are fixed by resetting network settings in Windows 11. If that fails, then there are advanced workaround to fix the same issue. In this blog post, we’re going to share of them that help users in fixing the same issue. Let’s start with the first one:
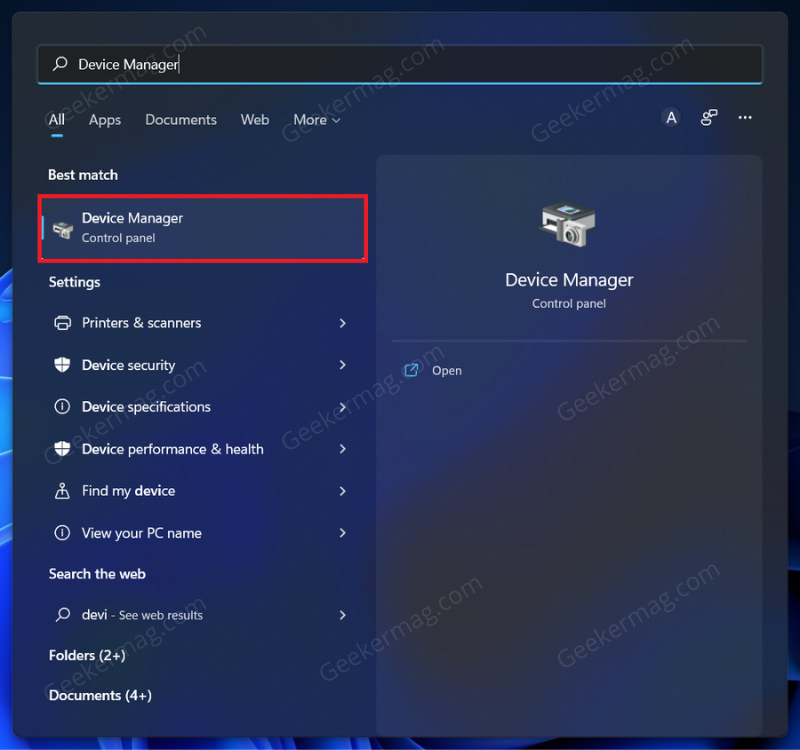
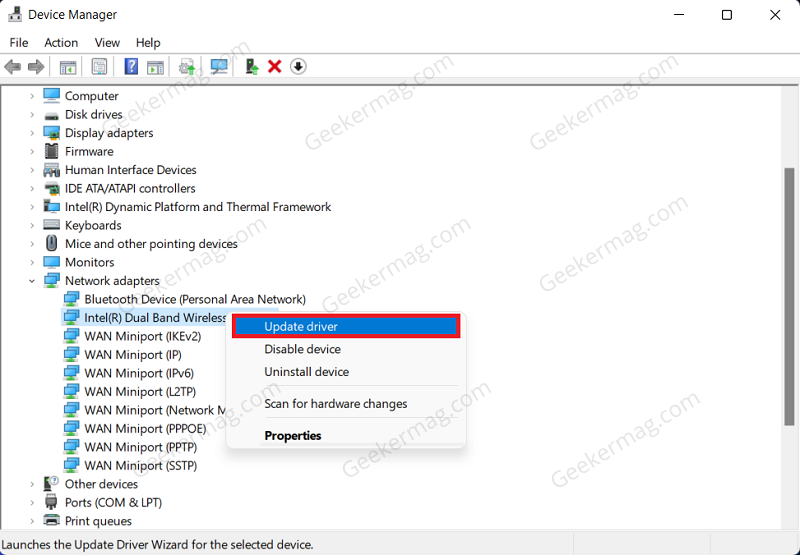
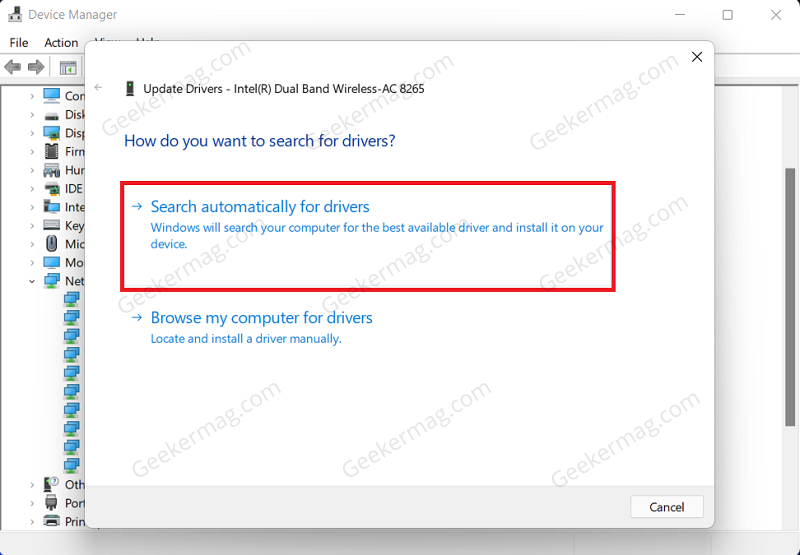
Update Network Driver
If you encounter this error, then you should first try updating the network driver. To do so, follow the steps given below- Open Start Menu by pressing the Windows key. In the Start Menu, search for and open Device Manager. In the Device Manager, expand the Network Adapter tab. Here, right-click on the network driver, and then click on Update Driver. Now, click on Search automatically for drivers to update the driver. Once done, close the Device Manager, and restart your PC.
Manually Change DNS Address
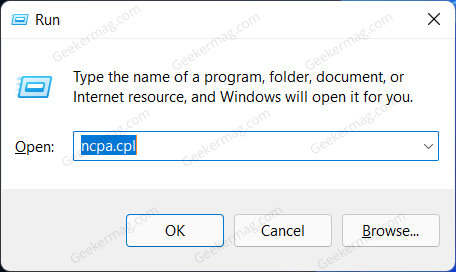
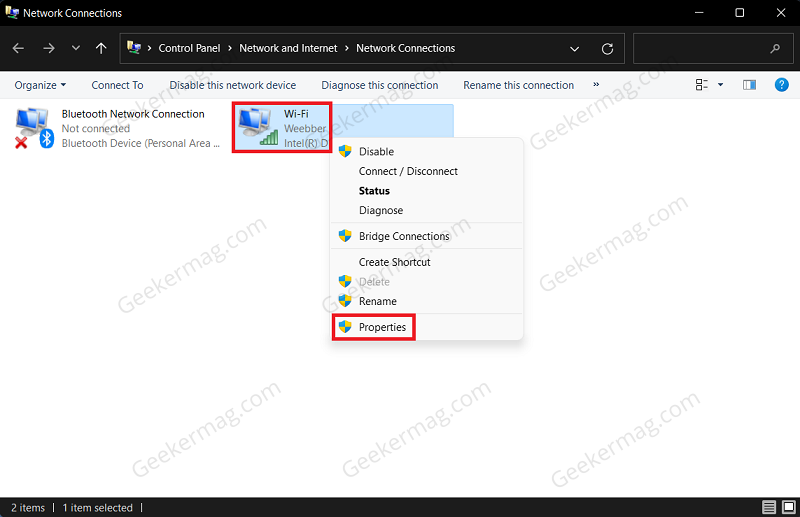
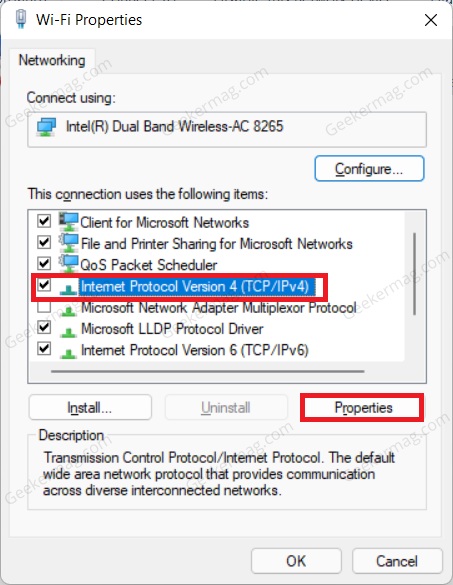
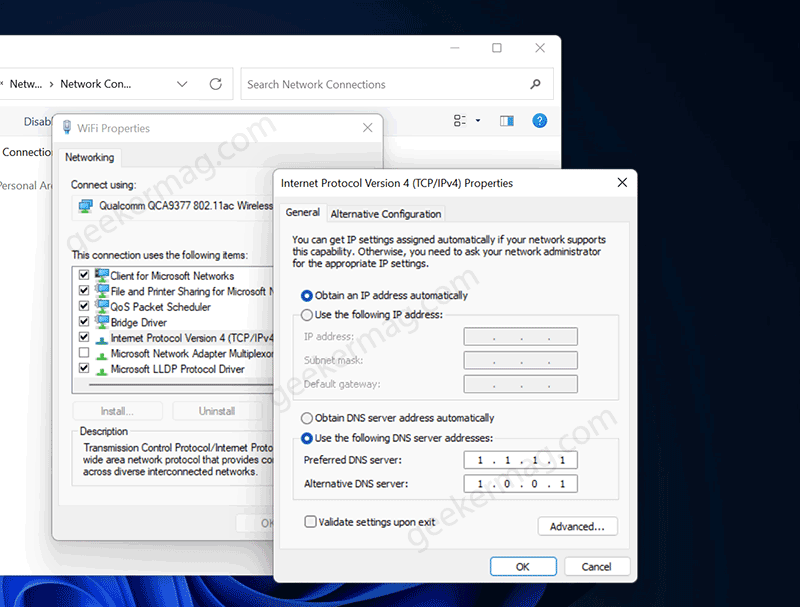
Another thing that you can try doing is manually changing the DNS address. Given below are the steps to change the DNS address manually- Press Windows + R key combo and then in the Run dialog box type ncpa.cpl and hit Enter. On the next window that opens up, select your network driver. Right-click on it and then click on Properties. Here, select Internet Protocol Version 4 (TCP /IPv4) and click on Properties. Now, select the option for Use the following DNS server addresses. Here, you can enter a custom DNS Server address from Cloudflare, Google, and the one you want. Learn how to set up Cloudflare DNS in Windows. For example; Set the Preferred DNS Server to 1.1.1.1 and set the Alternate DNS Server to 1.0.0.1 and click on OK. If you select Internet Protocol version 6 (TCP/IPv6) set Prefered to this: 2606:4700:4700::1111 and alternate to this 2606:4700:4700::1001. Once done, reconnect to the network you are connected to and you will no longer face the issue.
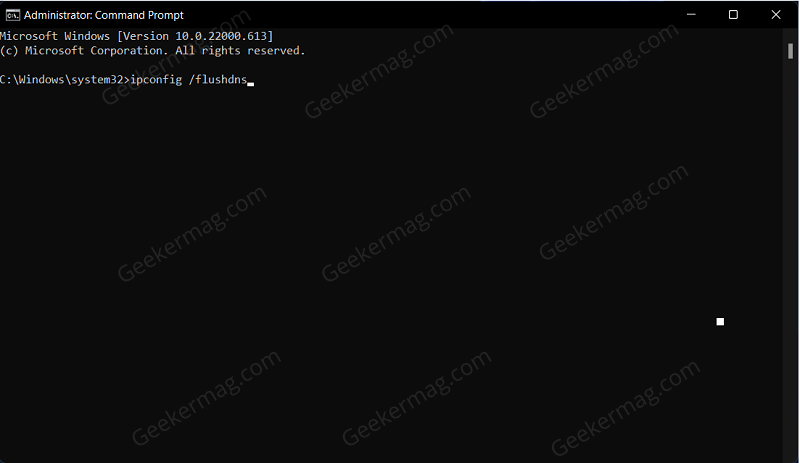
Flush DNS Cache
If you still face the issue, then you should try flushing the DNS cache. To do so, follow the steps given below- Click on the Start Icon and then search for CMD. Select Command Prompt and then click on Run as administrator. In the Command Prompt, type and execute the following commands-
ipconfig /flushdnsipconfig /registerdnsipconfig /releaseipconfig /renew
Once done, close the Command Prompt and the issue will be fixed. So these are some of the possible workarounds that you can apply to fix DNS server isn’t responding in Windows 11, and you should be able to use the internet again. If you know any other solution that we missed to cover and help in fixing the issue for you, then please share with other readers via comment.