Fallout 3 is a popular action role playing video games. The game is top-rated among gamers, but lots of users were complaining that after upgrading to Windows 10 they are finding lots of troubles in playing the Fallout 3 game on Windows 10. If you’re reading this post, then I’m sure that you’re one out of those users. So to help you out I decided to cover this troubleshooting guide on how to play Fallout 3 on Windows 10 without any error: Start to Finish.
How to Play Fallout 3 on Windows 10
The process to play Fallout 3 is very simple, but in Windows 10 when users are running the game, a dialog box appear telling that: While in some cases notification appears on the notification center telling that: Here is how you can troubleshoot the issue and play the game:
Launch Steam -> Library.
In the library look for the Game Fallout 3. Make a right click on it and from the context menu select Properties.
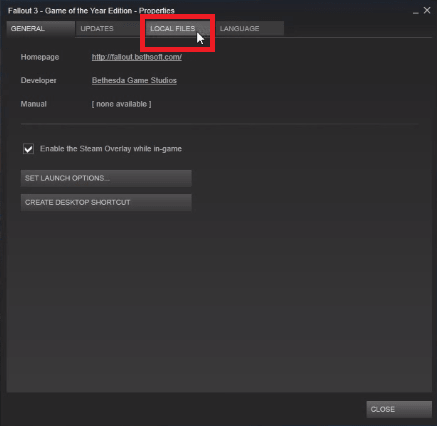
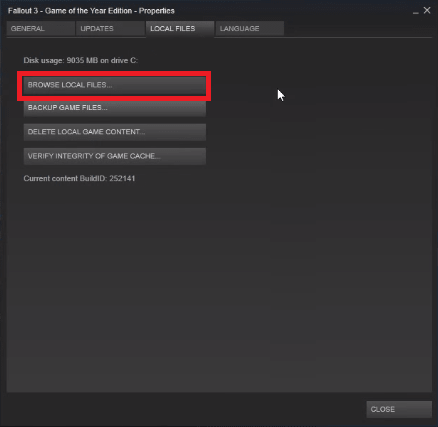
Here in the properties window click on Local Files tab and then click on Browse local files.
This will open the Fallout 3 installation folder. Scroll down until you find Fallout Launcher. Make a right click on it and from the context menu selection select Properties.
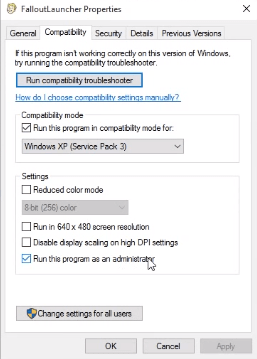
This will open the Fallout 3 Properties window. Just switch to the Compatibilty tab.
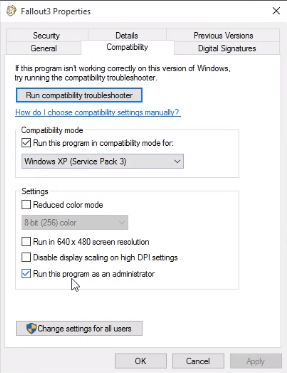
In the compatibility window make the following changes as visible in the above screenshot. 6. After that do the same thing for the Fallout3 application at done in step 5. Right click -> Properties -> Compatibility.
- Once all the changes are made close everything and get back to Steam Library. Don’t try to open the game.
- Download Games for Windows Marketplace Client using this link and run the installer to complete the installation. Once the installation is complete just Exit the installer.
- Head back to Steam Library and click on the Play button for Fallout 3 game.
Thats it. The Fallout 3 game will run flawlessly on Windows 10. Fallout 3 on Windows 10 Crash (New) Some users were complaining that when they are clicking on the New Game button, the game crashes. This is happening because the system they used to run the game don’t have a video card and using the wimpy GPU that comes preinstalled with Intel IGP. Here is how you can fix the issue:
- Click on this link to download Intel HD graphic Bypass package.
- Extract the file and copy the file named as d3d9x.dll. And paste it at the following location:
C:\Program Files (x86)\Steam\steamapps\common\Fallout 3 goty
After following above step, you still seeing the same error, that means you have put the file in the wrong directory. - After that, you’re required to reset resolution in the fallout launcher options. Here in the window click on the advance button and untick water reflections/refractions for the performance reasons with IGP. That’s it. So if you are facing problem while running Fallout 3 on Windows 10, then this is how to play Fallout 3 on Windows 10. Why don’t you give a try to this problem and let me know if you need any assistance?