So what is Live Kernel dump and how does it help? Keep reading to know. Usually, when the system is not working properly or crashes, it shows a Blue Screen of Death (BSOD) with a specific Stop code. Apart from that, it also creates a crash dump file. It’s handy when you have to figure out what causes the system to crash because it captures a record of system memory at the time of the crash. The data in the dump file can point to faulty apps, hardware or driver. Live Kernel dumps are the same as Crash dumps, but you can generate them without waiting for a system crash. Previously, creating Live Kernel dumps was only possible, for example, via the control panel. In the Windows 11 build 25188, the company has updated the Task Manager and added an option “Create a Live kernel dump file” using which you can create a similar live dump file whenever you want without the system crashing or rebooting the operating system.
Enable & Create Live Kernel Dumps option in Windows 11 Task Manager
Microsoft is testing this feature internally in Windows 11 build 25188 and is under development. In case, you want to give it a try, then you have to enable it first. Let’s learn how to do that.
Download the latest version of Vivetool from Github.Extract content of zip file to c:\vivetool folder.Launch Windows Terminal with admin rights. For that, right-click on the Start button and select “Terminal (admin)“.When the UAC dialog box appears, click Yes to continue.Depending on your default profile shell, you need to execute this command: c:\vivetool\vivetool.exe /enable /id:40430431Once you get the message “Successfully set feature configuration”, you’re done.Reboot your PC.
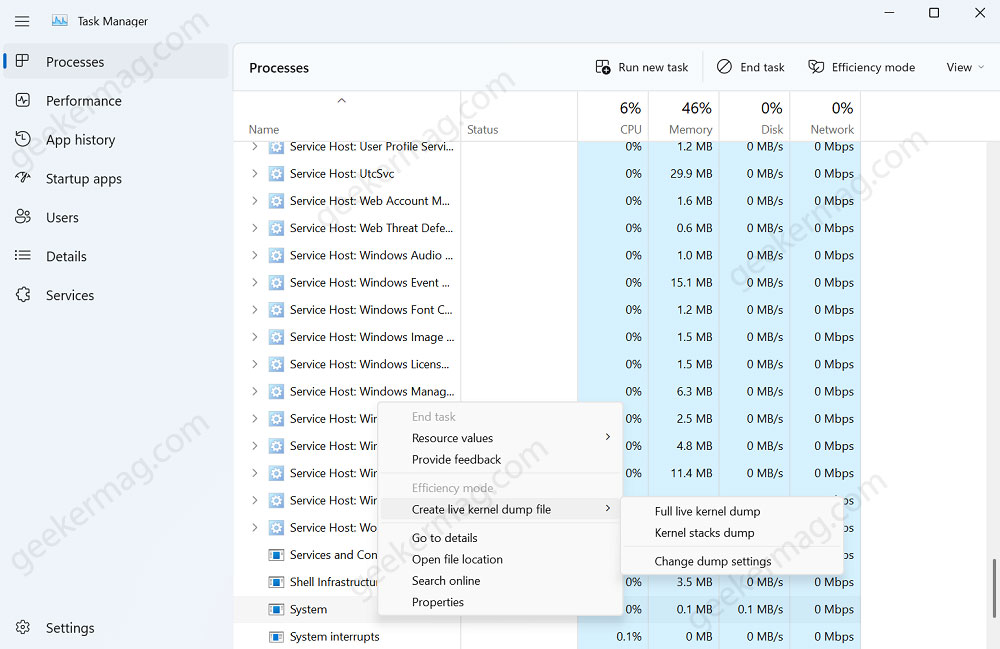
At this point, you have successfully added an appropriate entry in Task Manager of Windows 11. To create a Live Kernel Dumps file via Task Manager in Windows 11. Here’s what you need to do: Update – Starting with Windows 11 build 25201, it is now possible to ‘change dump settings’ when creating a live kernel dump via Task Manager in Windows 11. Launch Task Manager in Windows 11 and switch to the Details tab. Right-click on the System Process and then select “Create live kernel dump file“. Next, you can either select “Full live kernel dump” or “Kernel stack dump“, depending on your requirement. Apart from that, you can also select “Change dump settings” if you want to adjust dump settings before creating a dump. When you select this open, Task Manager Setting page, where you can manage various settings which include:
Default start pageReal-time update speedWindows managementLive kernel dump options (Advanced)
As simple as that! In case, you observe that this experimental feature is negatively affecting the performance of Task Manager, then you can execute this command: c:\vivetool\vivetool.exe /disable /id:40430431to disable it. So what is your opinion about Microsoft adding Create live kernel dump file option in Task Manager of Windows 11? Are you going to enable this entry? Let us know your opinion in the comments. Thanks, Rafael Rivera, and XenoPanther for this find.